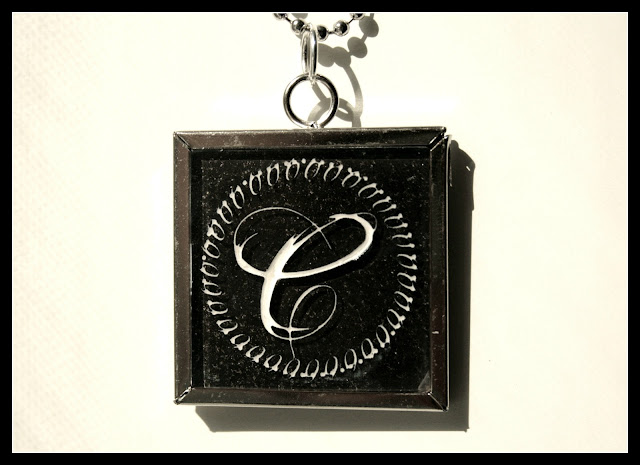
Are you ready to take your Teresa Collins Stampmaker to the next level??? Here's a little something that is a ton of fun and has HUGE impact. Once you make one, you will be making these for all of your friends - or at least be the envy of!! ✿
Although I would love to take credit for this idea it is not my original idea - I had seen it on a blog where they took their images and had them made but when you own your own Teresa Collins Stampmaker you can make them yourself.
Your going to create your image in the same fashion as you would for stenciling. However, if you are creating a monogram you will have to "flip" your image as I did. You will need to measure your necklace frame - both the opening of the frame and the interior width, which is what the dark square around the monogram is, I'll tell you the importance of that in a bit but the black part of the square is the difference in the opening and the interior part of the frame. This also gives you the dimension of your image or monogram in my case.
When you "cook" your image, instead of cooking it for the three minutes you are accustomed to when you create a stamp you are only going to cook it for two minutes - otherwise your image will not be recessed enough, trust me this took me a minute (or a few image pacs) to figure out...
Trim your edges away just as you normally do. You can tell you have a great image when you peel away that top piece and can see the image real clearly.
Wash your image just like normal.
Set your image just like you do for a stamp, for the full two minutes.
Next, you want to trim around the outer part of your square - this will create a "LIP" for your stamp to sit perfectly into the necklace frame. So only trim the outer, NOT the inner part of that square.
You can paint the back any color you want, I was experimenting and added some GENTRY's GLITTER into my paint.
Next you want to paint over your image and wipe away, you will end up doing this in a few layers... This does take time, I found using damp q-tips helps clean it up as you go. I also found that chocolate helps during this process. ✿ It takes practice and a little patience but the results are worth all the effort and by the time you do your third one you'll be a pro at it. I had a little extra time and added some glue and then a layer of Gentry's glitter to this one - I'm totally loving it!!
Next you will want to seal your creation with clear sealer - I think I picked it up at the hardware store for just a few bucks. OK, you should just know this as well, when your experimenting you should let everything dry completely before adding your sealer - some of the glitter went flying when I sprayed the sealer... I still love it so it's all good.
Once dry go ahead and put them in your frame. In real life you can see those flecks really do sparkle...


AWESOME CHERI!!!!!!!!!!! I will be expecting that necklace in the mail cause I know you made it for me! LOL
ReplyDeleteVery cool project, Cheri! :)
ReplyDeleteWhat a wonderful inspiration, Cheri! I have shared on my blog today! Enjoy!
ReplyDeletehttp://www.beadinggem.com/2013/07/how-to-use-acrylic-stamps-as-faux.html