Showing posts with label Necklaces ✿. Show all posts

Wednesday, August 8, 2012

"Lifting" with stamps, a fun necklace tutorial


I am loving this months free negative download for the Teresa Collins Stampmaker! 
You Can download it {HERE}


Chevrons are so "IN" right now so I thought I would try something fun with the
one from this month's set!


To make this fun necklace you will need the following supplies:

(2) 1x3 glass slides, 1x3 necklace frame, Cranberry Alcohol ink and some old
fashioned nail polish remover.


To start you will drop a few drops of the liquid ink onto the glass and let it
dry completely... ***TIP: if you get impatient and don't let it dry it will
smear - Your welcome, I figured that out just for you!! :)


Now comes the FUN part...you must act quickly here, drop some nail polish remover drops onto your chevron stamp and stamp it onto your glass and it will "LIFT" the alcohol ink off. You WILL have to do this acouple of times to get it all off. The great thing about this is that if you accidentally smear it you can wipe it all off with the remover and start all over.


Whew, see not so bad!


Now slide the other piece of glass over the inked side and slide into your
necklace frame and you are all done! Your very own custom chevron necklace!


I hope this inspires you to try something new! Check out more fun projects from Photocentric & The Teresa Collins Stampmaker Design Team {HERE}

Friday, August 12, 2011

Necklace tutorial using the Teresa Collins Stampmaker

Are you ready to take your Teresa Collins Stampmaker to the next level??? Here's a little something that is a ton of fun and has HUGE impact. Once you make one, you will be making these for all of your friends - or at least be the envy of!! ✿ 


Although I would love to take credit for this idea it is not my original idea - I had seen it on a blog where they took their images and had them made but when you own your own Teresa Collins Stampmaker you can make them yourself.

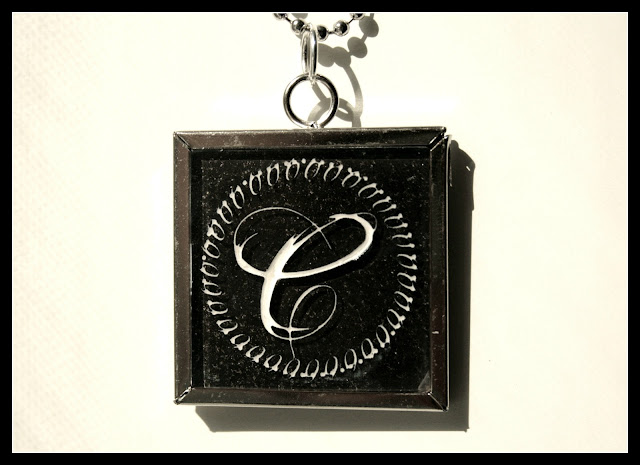
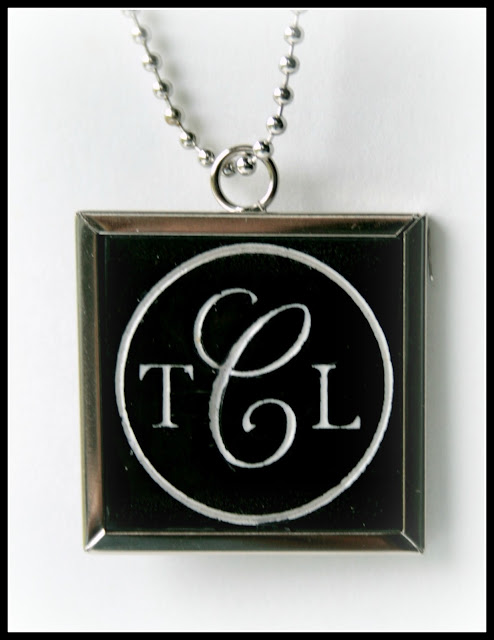
Your going to create your image in the same fashion as you would for stenciling. However, if you are creating a monogram you will have to "flip" your image as I did. You will need to measure your necklace frame - both the opening of the frame and the interior width, which is what the dark square around the monogram is, I'll tell you the importance of that in a bit but the black part of the square is the difference in the opening and the interior part of the frame. This also gives you the dimension of your image or monogram in my case.

When you "cook" your image, instead of cooking it for the three minutes you are accustomed to when you create a stamp you are only going to cook it for two minutes - otherwise your image will not be recessed enough, trust me this took me a minute (or a few image pacs) to figure out...

Trim your edges away just as you normally do. You can tell you have a great image when you peel away that top piece and can see the image real clearly.

Wash your image just like normal.

Set your image just like you do for a stamp, for the full two minutes.

Next, you want to trim around the outer part of your square - this will create a "LIP" for your stamp to sit perfectly into the necklace frame. So only trim the outer, NOT the inner part of that square.

You can paint the back any color you want, I was experimenting and added some GENTRY's GLITTER into my paint.

Next you want to paint over your image and wipe away, you will end up doing this in a few layers... This does take time, I found using damp q-tips helps clean it up as you go. I also found that chocolate helps during this process. It takes practice and a little patience but the results are worth all the effort and by the time you do your third one you'll be a pro at it. I had a little extra time and added some glue and then a layer of Gentry's glitter to this one - I'm totally loving it!!

Next you will want to seal your creation with clear sealer - I think I picked it up at the hardware store for just a few bucks. OK, you should just know this as well, when your experimenting you should let everything dry completely before adding your sealer - some of the glitter went flying when I sprayed the sealer... I still love it so it's all good.

Once dry go ahead and put them in your frame. In real life you can see those flecks really do sparkle...


Friday, July 29, 2011

Teresa Collins Stampmaker - my projects used for HSN/CHAs 2011

I'm so very excited to finally get to share with you all the projects I had made with the Stampmaker for Teresa's HSN event and CHA 2011s.

This is just a little charm bracelet, The background image is also stamped.

 Here are the same stamps used to create this necklace.


Did you know you could also emboss with the machine? I used the same image to create two different results, this one is the embossed:


And here is the same image used but made into a stamp rather than an embossing plate to make this necklace and another card.


I love this one, did you know you can make a photo or drawing into a stamp? I love this, think about the possibilities - baby's feet, your child's hand writting or drawing...the possibilities are so endless with this machine! The yellow background is also a stamp that comes with the machine and I use it all of the time.


ahhh, last but not least - my new addiction - I love making these necklaces... It's not my original idea and I will share a tutorial with you soon on how you can make these too, it will blow your mind and take your machine to a. whole. new. level.


Have an awesome weekend!! Cheri

Monday, May 2, 2011

Oh wow! Today, the necklace I created with the POSH papers by Teresa Collins Designs was on Good Things Utah!

The excitement never fades when I see one of my projects highlighted on Teresa's personal blog, it always, always feels like such an HONOR.

Today is no different, I feel like I am on Cloud NINE!!

Teresa is in Australia and her daughter Taylor stepped in to do the GOOD THINGS UTAH segment today. She did so Awesome!  Here is the link to the video

She showed how to create this reversible necklace using the POSH papers and blingage! This is really great project to make for mothers day, really simple & really cute! For detailed instructions check them out on Teresa's Blog.


~Cheri


Saturday, February 19, 2011

Reversable Necklace!

This is such a fun necklace!


1.cut two CAMEO"S from the cameo paper, glue the cameo's onto chipboard and then together. 
2.Glue Gentry's Glitter to the scallop edges of the cameo's and set aside to dry.  
3.Cut small circle from the pink fishnet paper, glue it to the back of tear drop round gem, cutting off any access paper. I find it's easier to do this way vs. trying to size it or to  create a pattern.
4.Cut a tear drop shape out of side B of the Gray flourishes paper glue to back of tear drop and cut off access.  Line each piece with silver foil tape. 
5. Then I went back to the cameo and filled with Glossy Accents, punched holes in cameo for jump rings 
6. Finally I attached all the pieces. I also added the center piece of Seth's fleur de Lis to the chain.

The best part of this necklace is that It's reversible! I love that so much! I hope you enjoy your necklace as much as I do. 

Supplies:
BLINGAGE: Chain from Ashley's Necklace Morgans Teardrop Small Black round from Seth's Fleur De Lis Gentry's Glitter
Posh paper used: Cameo paper Pink Fishnet paper Gray flourishes paper side B
Misc. Jump rings, silver foil tape


On another note, have you checked out the new design team blog? http://teresacollinsdesignteam.blogspot.com/

Have a really great weekend!! ~C

Tuesday, January 4, 2011

Hello 2011

I'm so EXCITED for 2011... So much goodness is in the air.


I finally found my "One Little Word" or rather it found me, in a few different ways. I had several words the last few days that were rolling around but something happened this evening, something good and it made me realize I had found it. Create, It means more to me that what one would normally think the word to mean. "One little word" is a phenomenon that Ali Edwards started and has caught on like a ripple effect, grows bigger and deeper each year.


CREATE


For me it means, yes, create art. Create good paths to follow, create good friendships, new friendships - everlasting friendships, create meals my family won't gag on, create experiences for my clients that will create bonds of everlasting friendships, create meaningful time with my family, create goodness to surround myself in.


So, speaking of creating, I've been creating for CHA, I'm so excited!!! I won't be attending but I'll be there in spirit watching blogs and videos and for photo's to appear on Facebook.


This week has also been busy at the office so I'm trying my very best to manage my time and prioritize so that after I'm done working hard, I can create hard. Speaking of hard... Started back on my exercise routine...YIKES, really... I hadn't really watched what I was eating very well over the holidays...5lbs I gained...ugh! I'd rather get a route canal then exercise but it is what it is... oh and eat better! HA! I won't say goodbye to my coffee but I'll compromise and give up half my chocolate intake...who can create with out chocolate..c'mon!! lol!!


Speaking of creating, I really needed something "new" to spice me up right before the holidays so I brought out Grandma's baubles, took apart some of her old old old Avon jewlery, watched a few you tube video tutorials on how to make these little satin flowers and made myself a little something old "NEW" again!


Yeah, how about that sideways photo??? It's straight on in my computer but here, not so much!! I've tried to fix it, but my blog is stubborn, so I'm not going to sweat it and get all stressed, if YOU just put your left ear to your shoulder, you should see it perfectly!


So, how cute is that? I've gotten SO many compliments on it and I now have a sweet little addiction to making those flowers. Just go to you tube and search for how to make satin flowers or satin flower tutorial, there's so many to watch.


Have a great one! ✿ Cheri

Friday, October 22, 2010

Pretty little necklace

I Love, love, love Ashley's necklace from the TC Blingage collection. 

I cut a 1 1/2 x 1 1/2 square of paper, inked the background in worn lipstick from the Tim Holtz distress inks. 

I stamped the boarder & monogram using the new Alphabet blingage stamp set

I glittered the monogram with Gentry's Glitter - By the way, this is THE DARN PRETTIEST glitter EVER, it REALLY sparkles and shines. I then placed the stamped square image under a piece of glass, wrapped it with some silver foil tape and tied a little ribbon on top.  


Have a great weekend! Hope you create something fun! ~Cheri

Saturday, July 31, 2010

Playing around...

Catching up on my google reader this morning I saw some cute little charm necklaces and it got me to thinking about these old optical lenses I had picked up some time ago and wanted to make a little necklace or something with them.

I really did go upstairs with every intention of organizing some of my embellishments and got a little side tracked once I found where I had put those lenses. After playing around for a bit this is what I came up with:


It's double sided for what ever mood I'm in.
 

I simply cut circles out of the
Free Style Damask paper:


FR1604 Damask - A

And cut matching circles from the Giving Thanks Labels transparencies:

GT1712 Labels Transparecies

I LOVE these transparency words, I have even glittered them, "blinged" them, and colored them.

If you've ever been hesitant of using transparencies try starting out on a small scale like I did with my necklace. It really helps open the door for creating something unique and hopefully you'll find a new love for transparencies!  ~Cheri

More Inspiration ✿

Related Posts Plugin for WordPress, Blogger...